Installing WAGMI in React (For Beginners)


I aim to make blockchain coding easy enough for even those without development experience to try. Instead of starting with installing VS Code or Node, I'll focus on writing and discussing blockchain-related code from the beginning.
In this post, I'll install WAGMI, a library providing React Hooks necessary for working with blockchains like Ethereum. Simply put, it enables actions like connecting to MetaMask, displaying MetaMask balance information, and interacting with smart contracts. It's compatible with various wallets including Coinbase and WalletConnect.
Blockchain apps require interaction with wallets, and installing WAGMI simplifies implementing these features. This series will gradually expand, starting with connecting MetaMask and retrieving its address using WAGMI, creating a very simple web app.
While WAGMI works outside React, it's smoother within it. React is preferable, but installing NextJs or React directly might cause issues with TypeScript version compatibility or node-gyp. I dislike visible errors, so I'll use a different approach in this post.
Lately, I prefer NextJS, but for blockchain apps that interact with wallets client-side, I recommend React, as NextJS would require client-side rendering anyway.
After various trials, the only error-free installation was with Vite(React), so I'll discuss installing with Vite in this post.
First, go to the directory where you will install the web app.
npm create vite . Install Vite in the terminal. The reason for using a dot is to install it in the current directory. If you want to install in a new folder, replace the dot with the folder name.
Next, you'll encounter several questions.
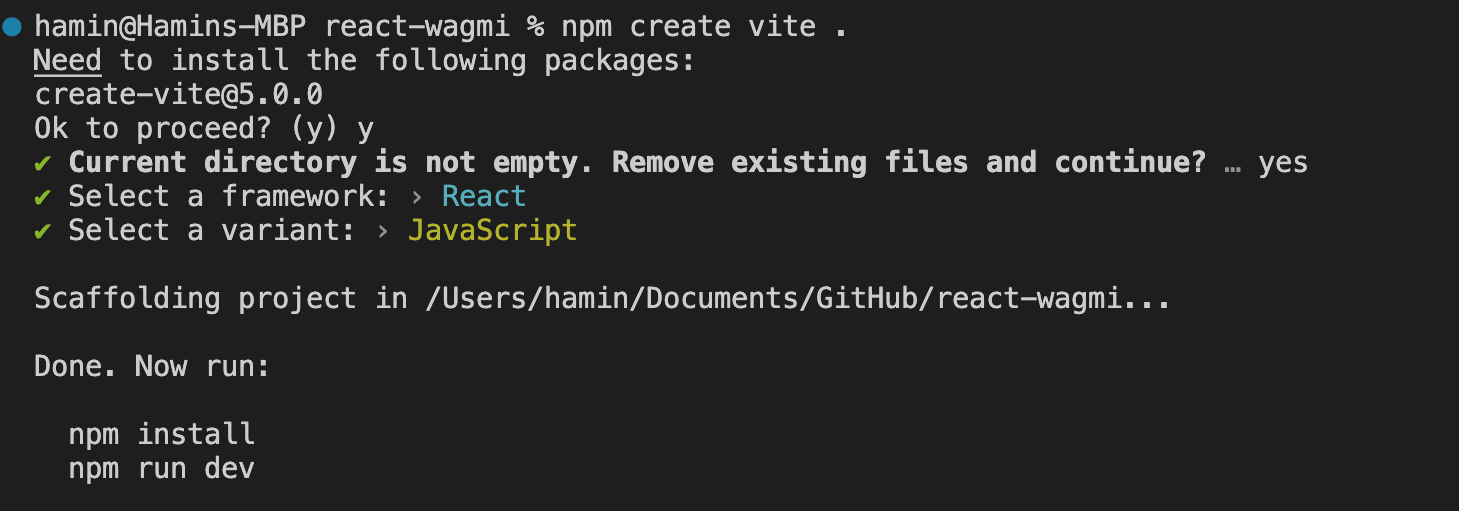
... Answer "Yes" to the question asking if you want to proceed.
... Answer "Yes" when asked if it's okay to delete the current folder.
... For the question about which framework to choose, select React using the keyboard.
... Choose between JavaScript or TypeScript as per personal preference; I chose JavaScript.
After this, React should be successfully installed.
Next, you need to install WAGMI. While installing only WAGMI is fine, I also recommend installing VIEM for future use.
npm install wagmi viemAfter installation, go to App.jsx and make the following changes.
import { WagmiConfig, createConfig, configureChains, mainnet } from 'wagmi'
import { publicProvider } from 'wagmi/providers/public'
import Profile from './components/Profile/Profile';

const { publicClient, webSocketPublicClient } = configureChains(
  [mainnet],
  [publicProvider()],
)

const config = createConfig({
  autoConnect: true,
  publicClient,
  webSocketPublicClient,
})


function App() {

  return (
    <>
      <WagmiConfig config={config}>
        <Profile />
      </WagmiConfig>
    </>
  )
}

export default App
In simple terms, we're importing various functions from the installed wagmi and also bringing in the Profile component. Although the Profile component isn't installed yet, it's the file we're about to create. Most functions imported from wagmi are for configuring settings.
In configureChains below, I've set up the mainnet. If you want to interact with a different blockchain, you can change or add to this section.
const { publicClient, webSocketPublicClient } = configureChains(
  [mainnet],
  [publicProvider()],
)
Then, I created a config function for that chain and wrapped the Profile component with WagmiConfig.
  <WagmiConfig config={config}>
        <Profile />
  </WagmiConfig>
Now, create a components folder in the /src directory, then create a Profile folder under it, and finally create a Profile.jsx file inside that folder.
The code to be included there is...
import React from 'react';
import { useAccount, useConnect, useEnsName } from 'wagmi'
import { InjectedConnector } from 'wagmi/connectors/injected'

function Profile() {

    const { address, isConnected } = useAccount()
    const { data: ensName } = useEnsName({ address })
    const { connect } = useConnect({
        connector: new InjectedConnector(),
    })

    if (isConnected) return <div>Connected to {ensName ?? address}</div>
    return <button onClick={() => connect()}>Connect Wallet</button>
}

export default Profile;
From wagmi, I imported the hooks: account, connect, and ensName. Each of these handles different functionalities: account for the user's account, connect for establishing connections, and ensName for ENS (Ethereum Name Service) accounts. The InjectedConnector helps connect to a wallet installed in the current browser, typically by looking for window.ethereum.
const { address, isConnected } = useAccount()Using the useAccount hook retrieves information about the wallet address and its current connection status.
const { connect } = useConnect({
        connector: new InjectedConnector(),
    })
The useConnect hook allows for the connection of a wallet address.
    if (isConnected) return <div>Connected to {ensName ?? address}</div>
    return <button onClick={() => connect()}>Connect Wallet</button>
Thus, with these hooks, you can create a simple app where, if an account is not connected, only a 'connect' button is displayed. Once connected, the app shows the address, and if there's an ENS account, it displays the ENS address.

This is a very simple app, but once the wallet is connected, it can display the user's assets and establish connections with smart contracts. It's possible to link social accounts without showing the wallet, or even hide the wallet altogether, but behind every blockchain app, there is a wallet. Therefore, creating an app that connects to a wallet is a crucial and foundational step for progressing to the next stages.
Repo: https://github.com/kanghamin/react-wagmi/tree/react-wagmi-template
Source: Generated through OpenAI's DALL·E.